Creating Stunning Topographic Maps in QGIS
Turn flat satellite imagery into rich, 3D-like visualizations by combining Nimbo’s cloud-free Basemaps with our global Hillshade layer.
In the world of GIS and mapping, context is everything. While a high-quality satellite image provides essential ground truth, it can often feel “flat,” making it difficult to understand the terrain’s topography.
By combining Nimbo Basemaps (our cloud-free Sentinel-2 mosaics) with Nimbo Hillshade (derived from DEMs), you can add depth, texture, and relief to your maps. This tutorial will guide you through the process of setting up these layers in QGIS to create professional-grade cartography.
The Secret: “Multiply” vs. Transparency
Section titled “The Secret: “Multiply” vs. Transparency”You might wonder why we don’t simply lower the opacity of the Hillshade layer. This technique mimics layer blending found in graphic design software like Photoshop or GIMP, and here is the technical reason why it is superior for topography:
-
The Flaw of Transparency: If you simply reduce the opacity (e.g., to 50%), the white parts of the Hillshade (flat terrain or illuminated slopes) will act like a white fog, washing out the vibrant colors of the satellite imagery. The result looks low-contrast and hazy.
-
The Math behind “Multiply”: The Multiply mode performs a mathematical operation on every pixel. It normalizes color values between 0 (Black) and 1 (White) and multiplies the Basemap value by the Hillshade value:
Result = Basemap × HillshadeThis creates two desirable effects:
- Whites are invisible: Since
Color × 1 = Color, the white areas of the hillshade completely disappear, leaving the original satellite imagery perfectly intact. - Shadows are preserved: Since
Color × 0.5 = Darker Color, the grey shadows darken the underlying imagery without washing it out, effectively “burning” the relief into the map.
- Whites are invisible: Since
Now that you understand the theory, let’s apply it in QGIS.
Prerequisites
Section titled “Prerequisites”Before we begin, ensure you have the following:
- QGIS Installed: Download the latest version of QGIS.
- A Nimbo Account: You need an active account to access our API.
- Your API Key: Retrieve your key from the Nimbo Dashboard.
Security Note: Keep your API key secure. Do not share it in public code repositories or screenshots.
Step 1: Connect to Nimbo Services in QGIS
Section titled “Step 1: Connect to Nimbo Services in QGIS”Nimbo delivers data via standard OGC protocols (WMTS) and XYZ tiles, making integration with QGIS seamless. We will use the XYZ Tiles connection for the fastest rendering performance.
1. Add the Basemap Layer
Section titled “1. Add the Basemap Layer”The Basemap layer provides the color and visual context (vegetation, water, urban areas).
-
Open QGIS.
-
Navigate to Layer > Data Source Manager (or click the corresponding icon in the toolbar).
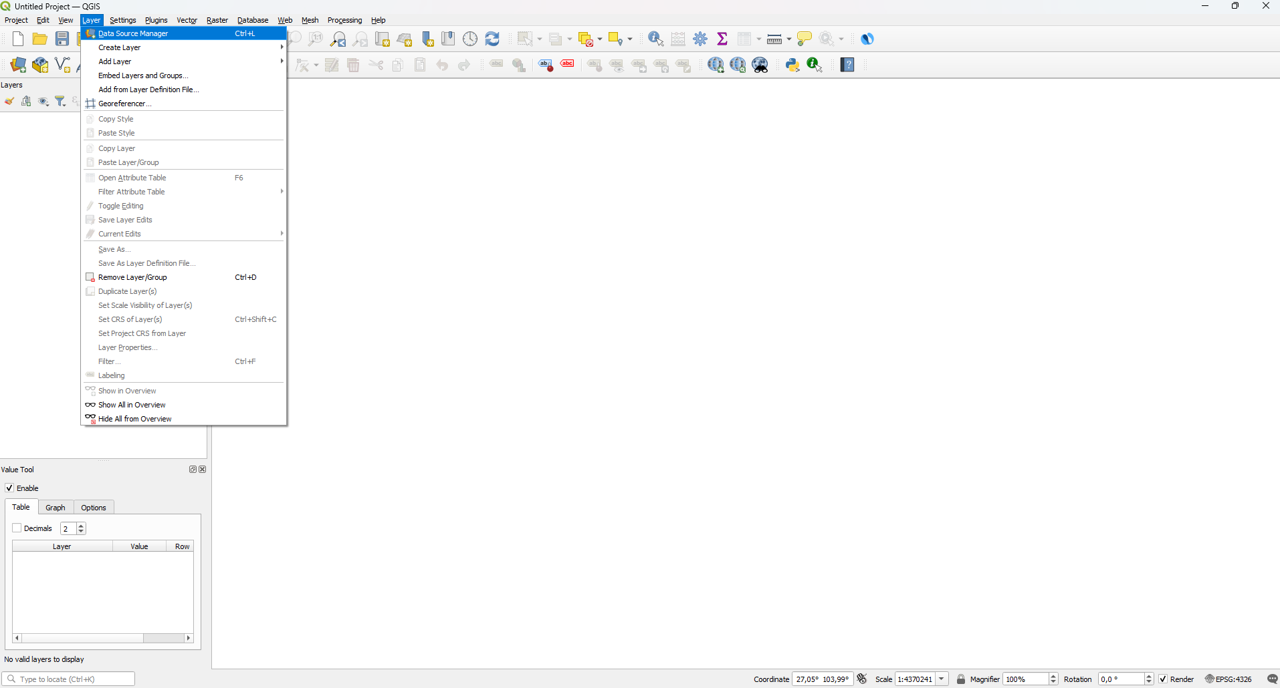
Menu > Layer > Data Source Manager -
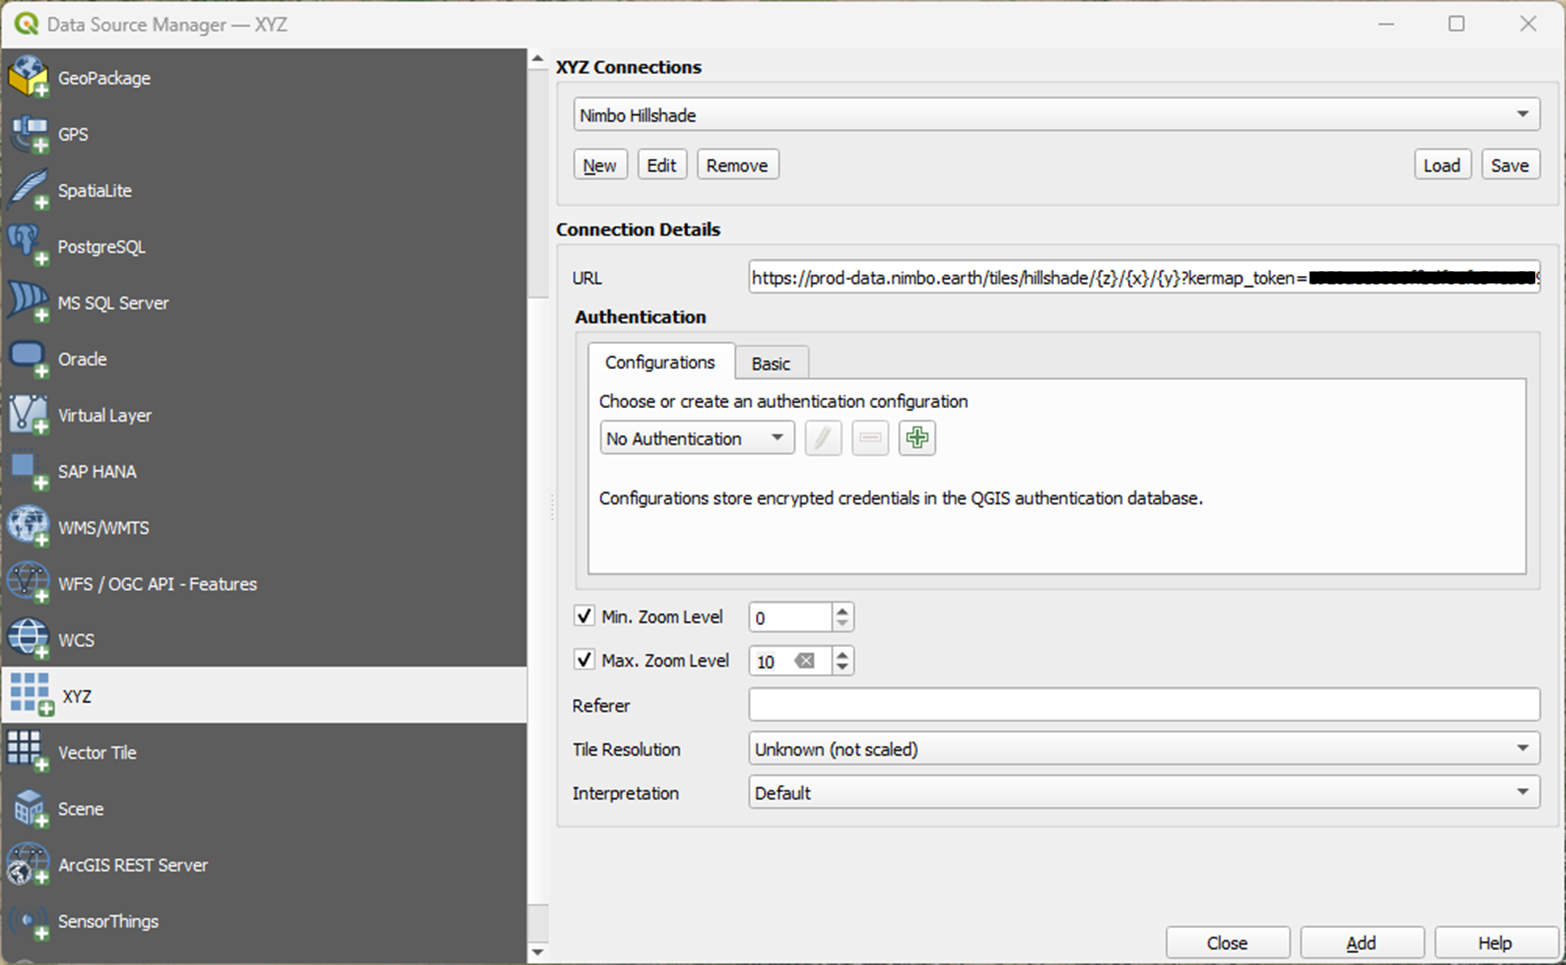
In the XYZ Tiles section, create a new connection and enter the following details:
- Name:
Nimbo Basemap June 2025 - URL:
https://prod-data.nimbo.earth/mapcache/tms/1.0.0/{year}_{month}_{layer_name}@kermap/{z}/{x}/{-y}.png?kermap_token=YOUR_API_KEY - (Replace
YOUR_API_KEYwith your actual key).
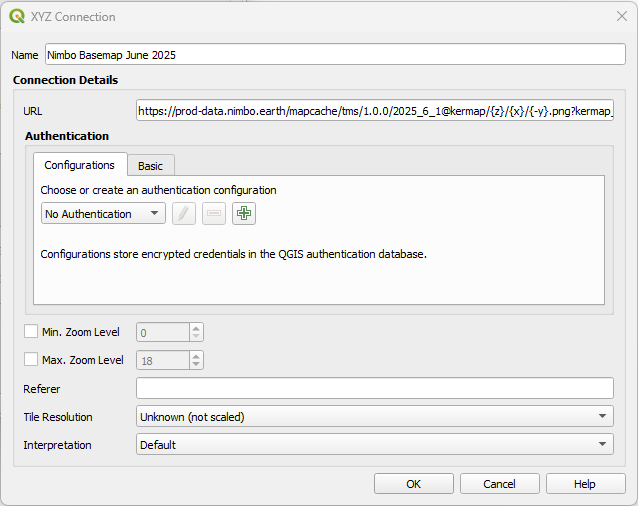
Configure the Name and URL. Ensure the year, month, and layer identifier are correct, and verify the -yparameter. - Name:
-
Click OK to save the connection, then select it and click Add.
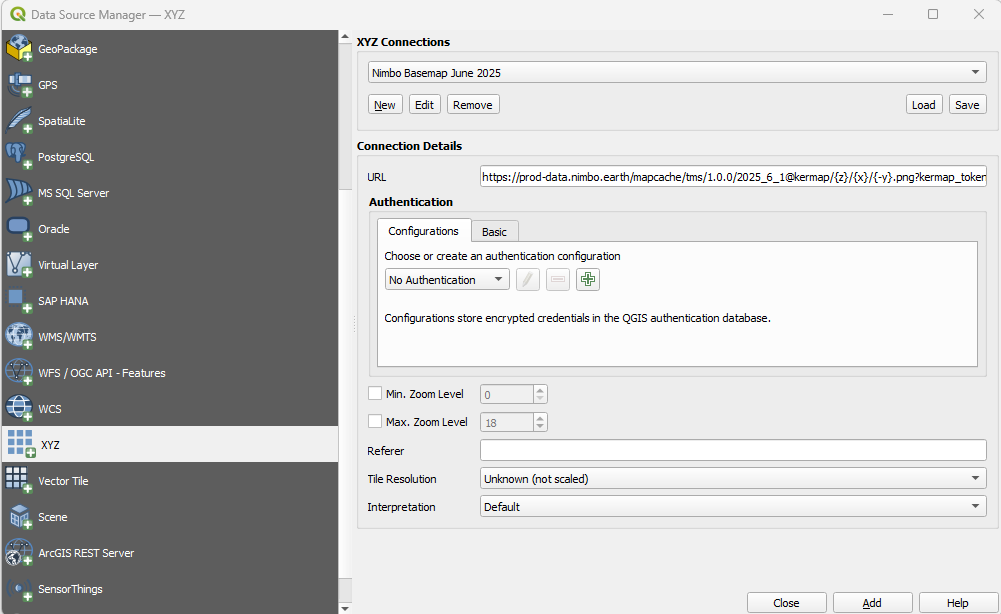
Once configured, click ‘Add’ to place the layer on the map. -
Your new
Nimbo Basemap June 2025layer is now loaded into your workspace.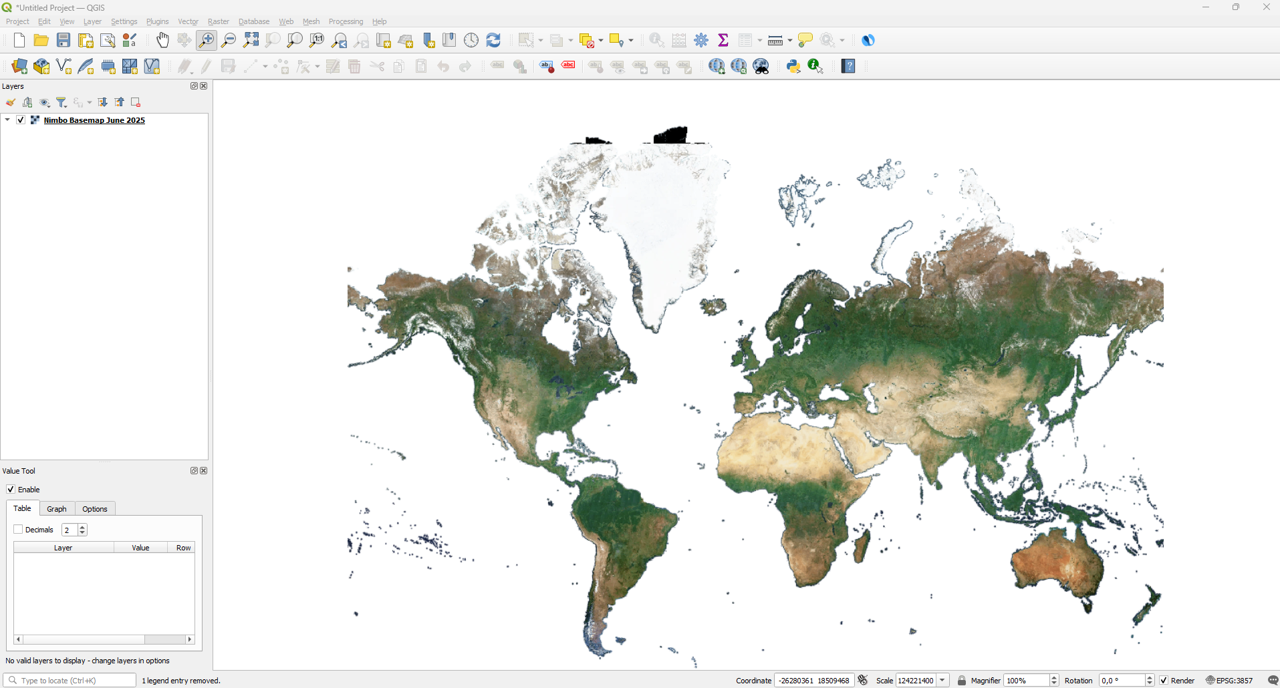
The Nimbo Basemap successfully loaded in the workspace.
2. Add the Hillshade Layer
Section titled “2. Add the Hillshade Layer”The Hillshade layer provides the shadows and lighting that simulate terrain depth.
-
Open the Data Source Manager again.
-
Create a new XYZ connection with the following details:
- Name:
Nimbo Hillshade - URL:
https://prod-data.nimbo.earth/tiles/hillshade/{z}/{x}/{y}.webp?kermap_token=<YOUR_TOKEN> - Max. Zoom Level:
10
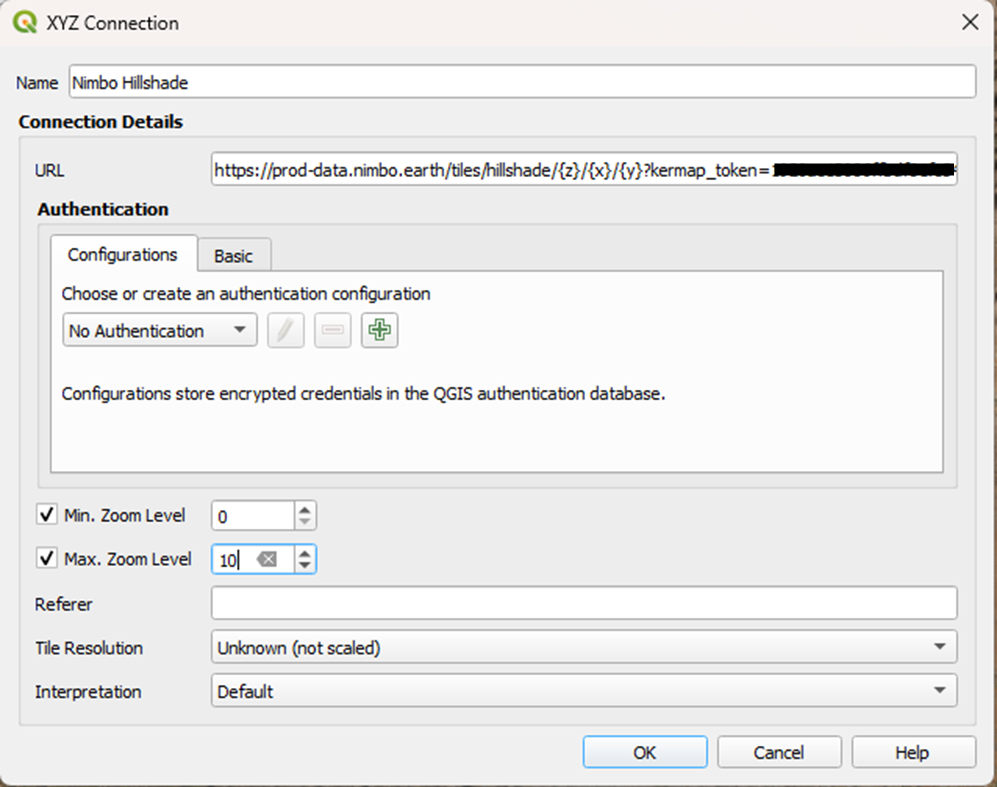
Configure the Hillshade connection details. Don’t forget to set Max Zoom Level to 10. - Name:
-
Click OK, select the connection, and click Add.
Add the Hillshade layer to the map. -
Your
Nimbo Hillshadelayer is now loaded into your workspace.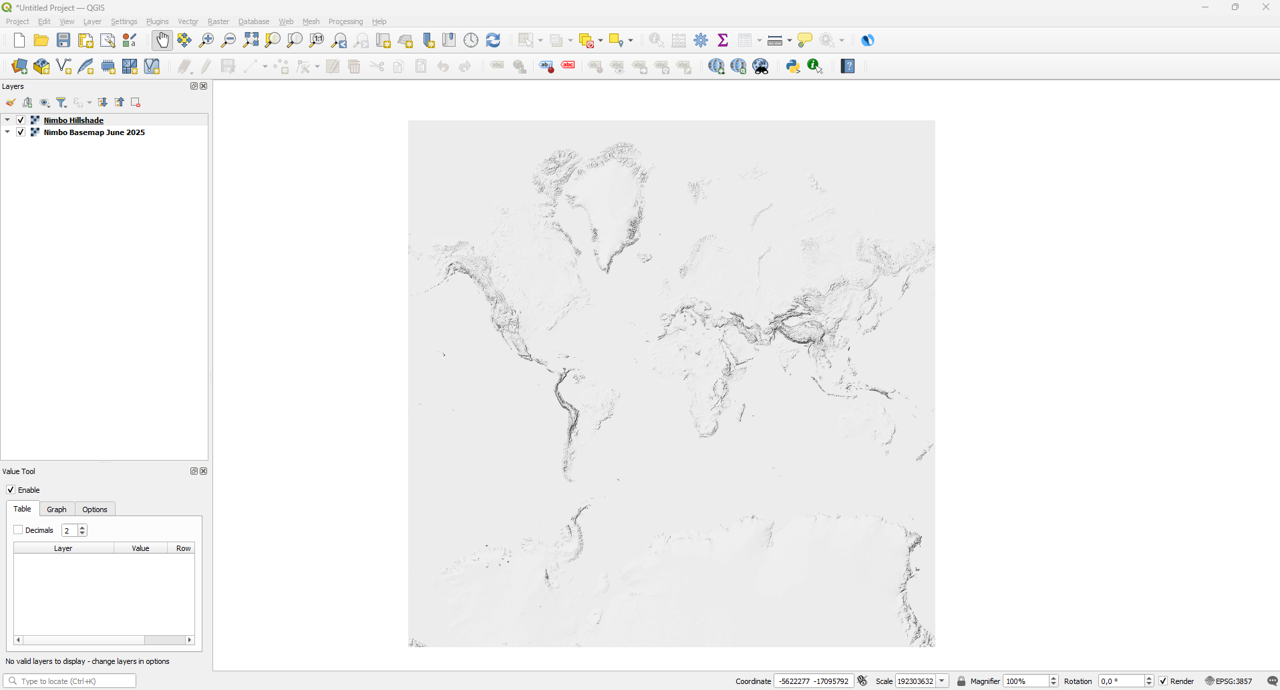
The Hillshade layer is now displayed on top of the map.
Step 2: Layer Ordering and Visualization
Section titled “Step 2: Layer Ordering and Visualization”At this stage, you likely see only the Hillshade (a greyscale image of the terrain) because it is covering the Basemap. To create a stunning visualization, we need to blend these two layers.
- Go to the Layers Panel.
- Ensure the Hillshade layer is located on top of the Basemap layer.
Step 3: The “Multiply” Blending Mode
Section titled “Step 3: The “Multiply” Blending Mode”This is the key step to achieving that “3D” look without actually generating a heavy 3D model. We will use QGIS blending modes to merge the shadows of the hillshade with the colors of the basemap.
- Right-click the Nimbo Hillshade layer and select Properties.
- Navigate to the Symbology tab.
- Look for the Color Rendering section at the bottom and expand it.
- Change the Blending mode from
Normalto Multiply.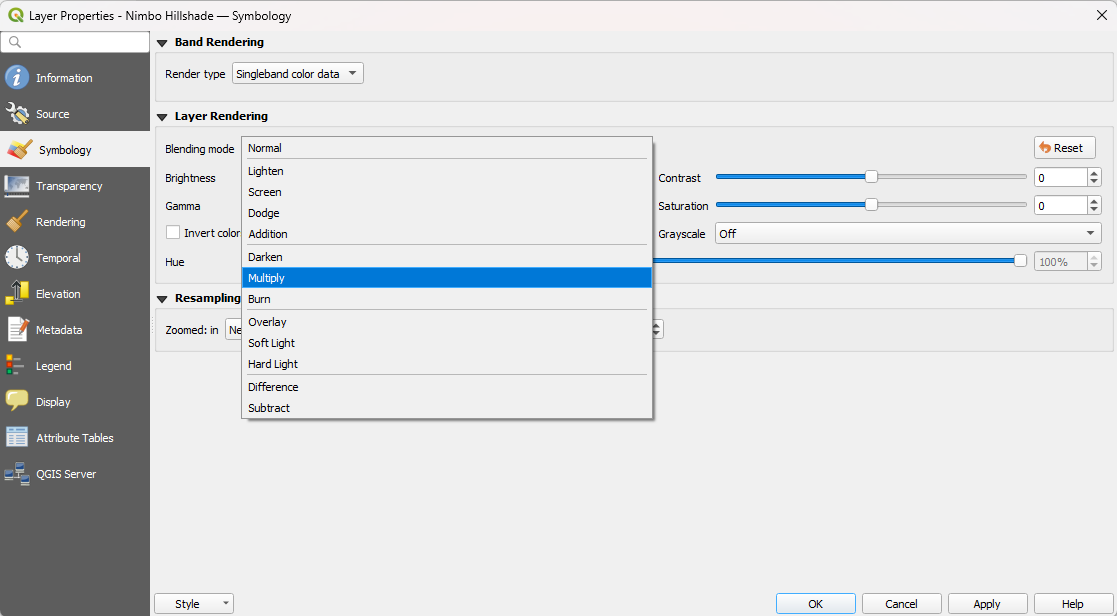
Symbology > Color Rendering > Blending mode > Multiply - (Optional) Adjust the Brightness or Contrast sliders if the shadows appear too harsh for your specific area of interest.
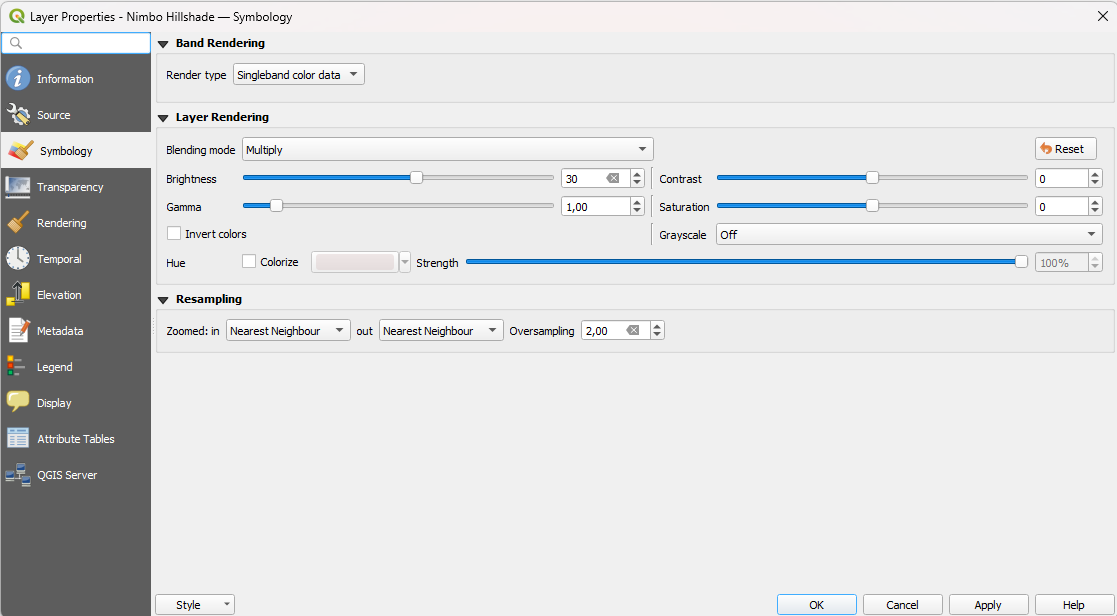
Increase brightness to 30-50 for softer shadows. - Click Apply and OK.
Step 4: Fine-Tuning the Result
Section titled “Step 4: Fine-Tuning the Result”Now that your layers are blended, navigate to a mountainous region (e.g., the Alps, the Pyrenees, or the Rockies) to see the full effect.
- Adjust Opacity: If the terrain effect is too strong and obscures the map details, go back to the Hillshade Properties -> Transparency and lower the Global Opacity to roughly 60-80%.
- Enhance Saturation: Sometimes blending can darken the image slightly. You can boost the saturation of the Basemap layer in its Symbology settings to make the vegetation pop.
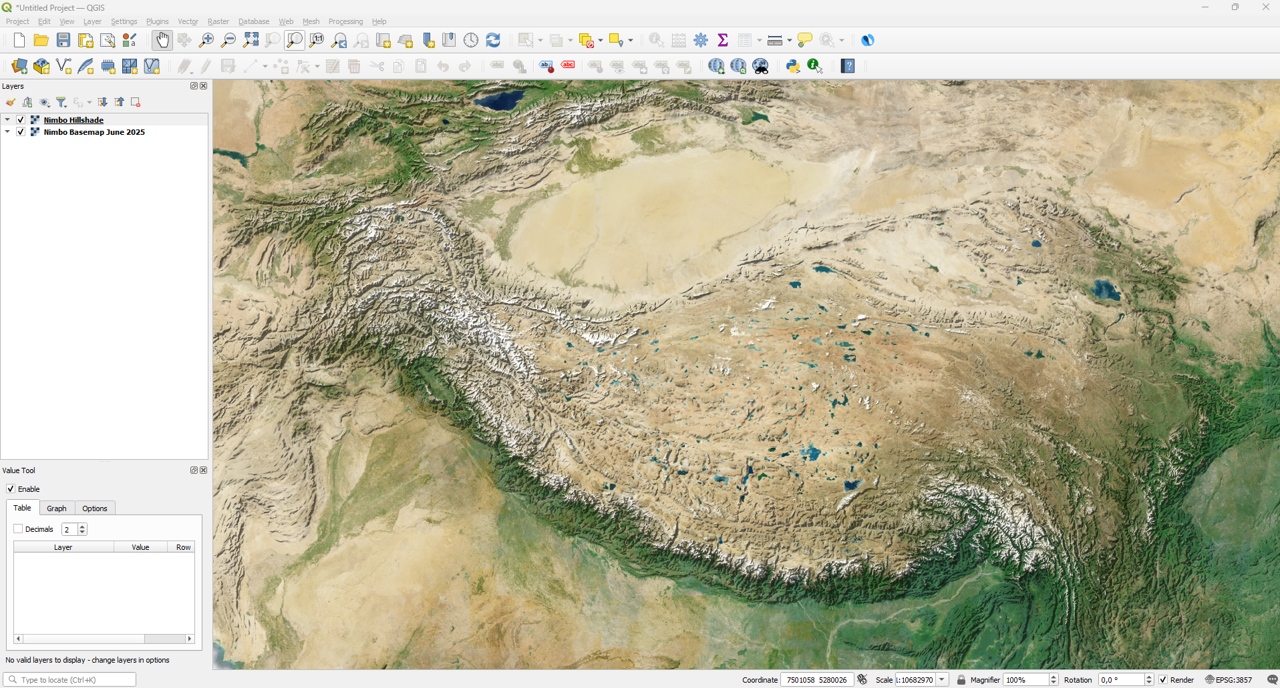
The Result
Section titled “The Result”You now have a high-performance, global map that combines the recency and clarity of Nimbo basemaps with the topographical context of high-resolution hillshades.
Useful Resources
Section titled “Useful Resources”- Basemaps Documentation - Full technical specs for our satellite layers.
- Hillshade Documentation - Details on our global elevation derivatives.