Using Nimbo in After Effects with GeoLayers 3
In the fast-paced world of broadcast production, clarity and timeliness are everything. Whether you are animating a map for a daily news report, a deep-dive documentary, or a geopolitical weather segment, your audience expects high-quality, up-to-date visuals.
Nimbo provides broadcast professionals with a unique edge: complete, homogeneous, and cloud-free base maps updated every month since 2019. Unlike standard static maps, Nimbo allows you to visualize seasonal changes or urban developments with high-resolution Sentinel-2 data directly within your After Effects projects using the GeoLayers 3 plugin.
Video Tutorial
Section titled “Video Tutorial”Watch the full integration process in the video below:
1. Prepare your Data Access (TMS)
Section titled “1. Prepare your Data Access (TMS)”Before opening After Effects, you need a URL to access Nimbo’s imagery stream.
- Go to the official Nimbo Documentation.
- Select the TMS (Tile Map Service) page from the menu.
- Copy the example URL template.
Customizing the URL
Section titled “Customizing the URL”You must modify the template parameters to choose the specific data you want to display :
- Year: The year of the imagery (e.g.,
2025). - Month: The month number (e.g.,
8for August). - Data Number: Use
1for standard RGB (Natural Color) imagery.
Example URL Structure:
.../tms/1.0.0/2025_8_1@kermap/{z}/{x}/{y}.png
2. Authenticate with your Token
Section titled “2. Authenticate with your Token”To retrieve data from Nimbo, you must append your personal API token to the URL.
- Log in to maps.nimbo.earth.
- Click on your Dashboard.
- In the bottom right corner, copy your personal token—a unique string of numbers and letters.
- Add this token to the end of your URL:
?kermap_token=YOUR_TOKEN_HERE.
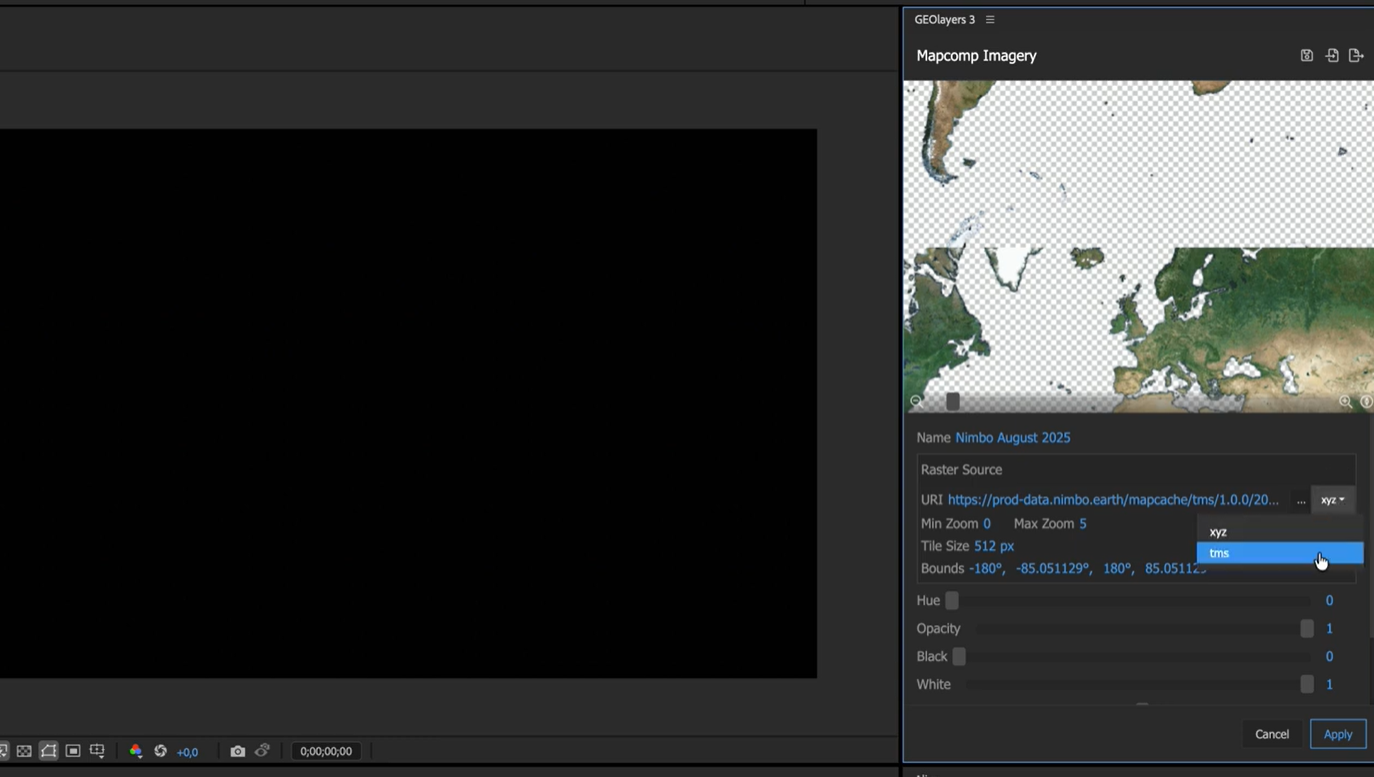
2. Setting Up GeoLayers 3
Section titled “2. Setting Up GeoLayers 3”With your URL ready, move into After Effects to register Nimbo as a custom imagery source.
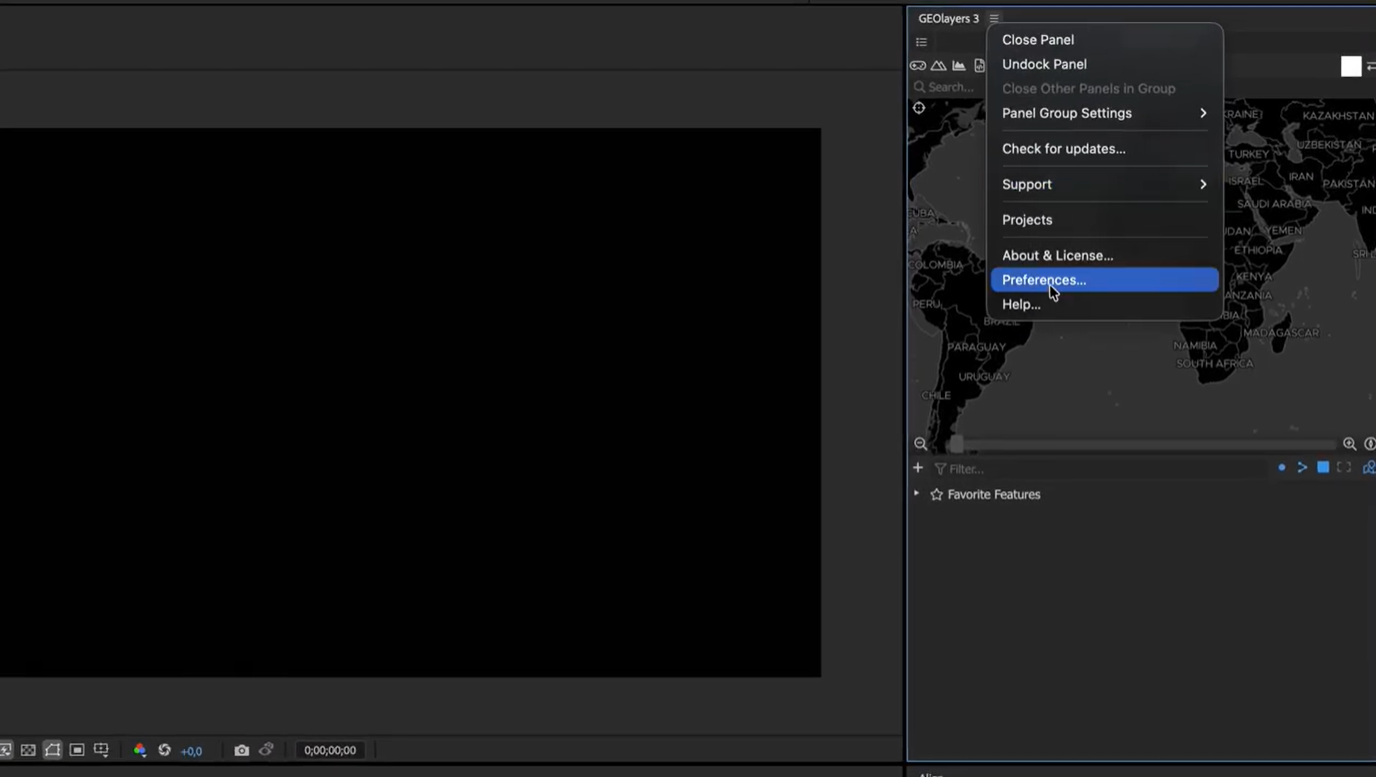
Accessing Preferences
Section titled “Accessing Preferences”In the GeoLayers 3 panel, click the icon next to the title and open Preferences.
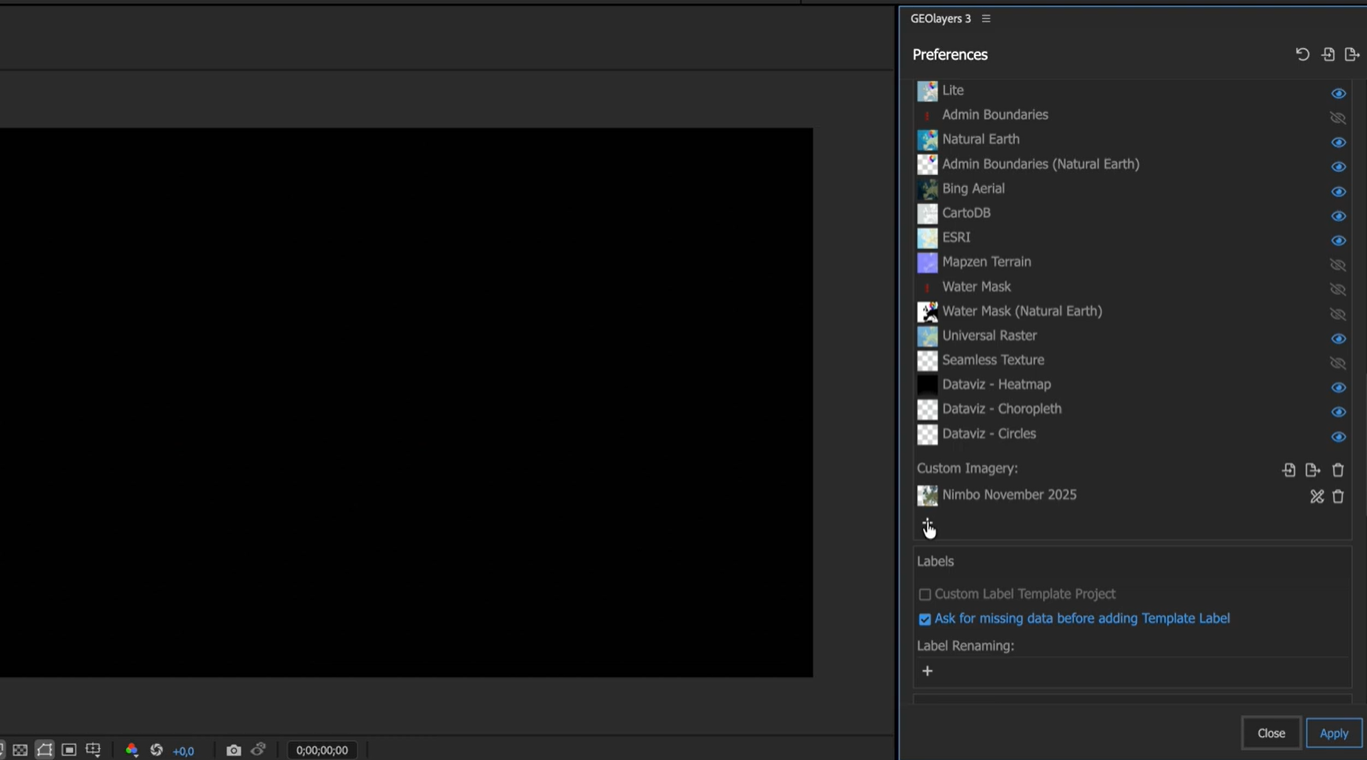
Adding the Custom Layer
Section titled “Adding the Custom Layer”Scroll down to the Mapcomp Imagery section. Under Custom Imagery, click the Plus (+) icon to add a new entry.
Configuration Parameters
Section titled “Configuration Parameters”Enter the following technical details to ensure the stream displays correctly:
- Name: Provide a clear name (e.g., “Nimbo August 2025”).
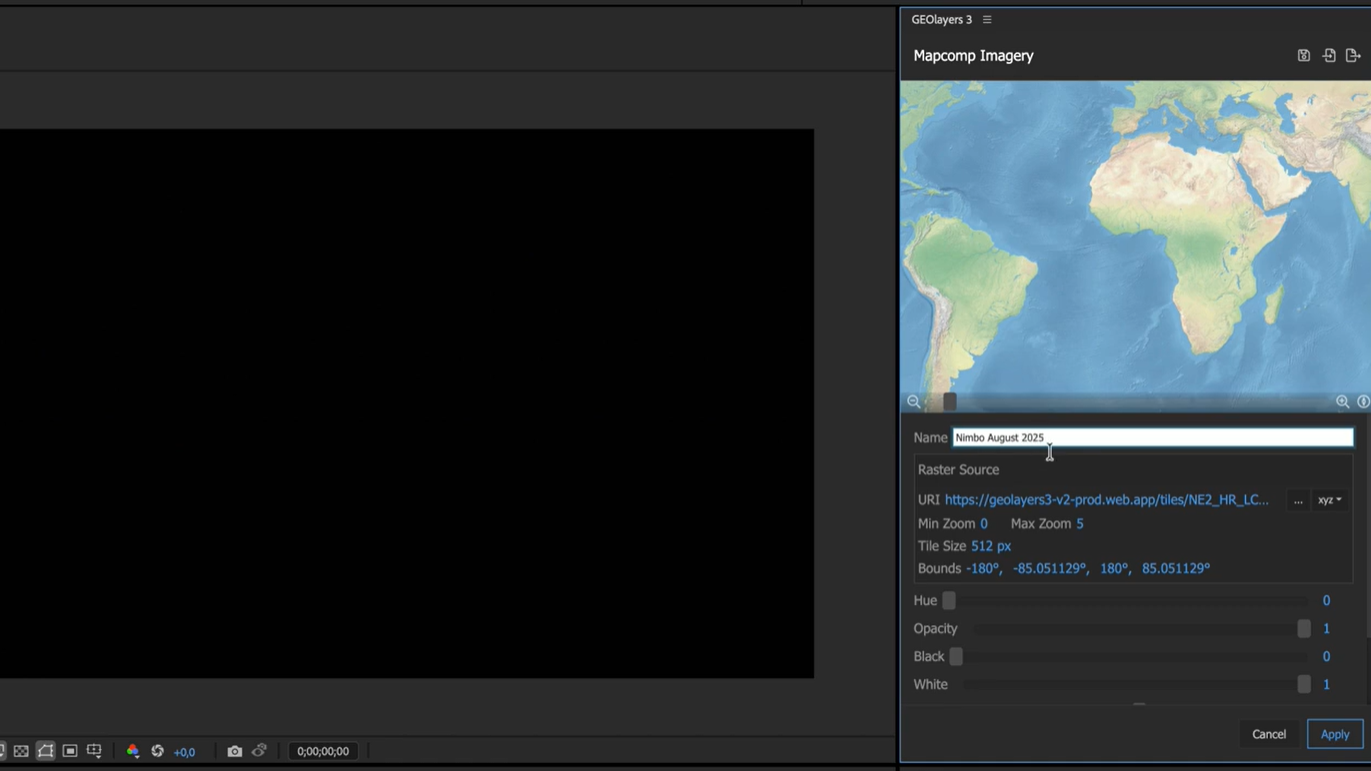
- URL: Paste your customized Nimbo TMS URL.
- Format: Select TMS from the dropdown menu.
- Max Zoom: Set this to the highest possible value (23) for maximum detail during close-ups.
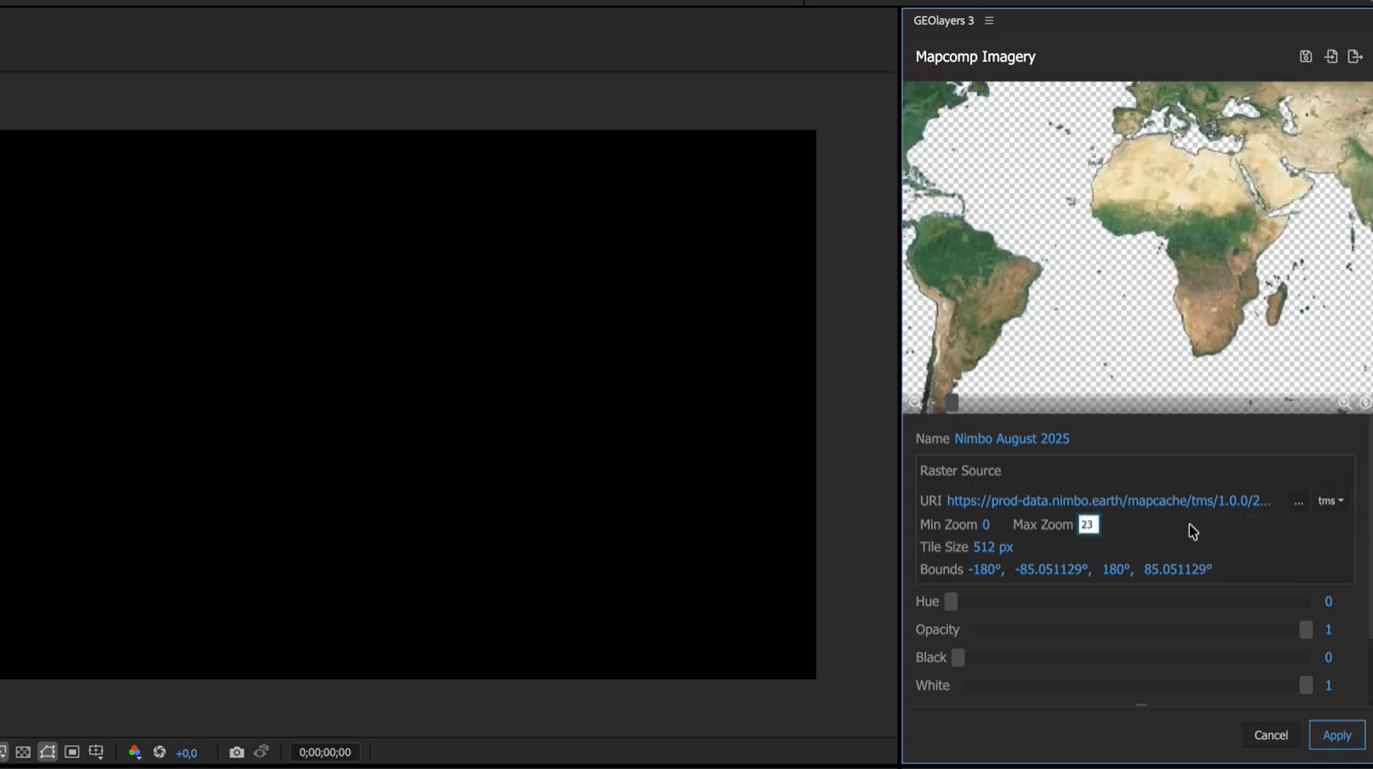
- Tile Size: Set to 256 pixels.
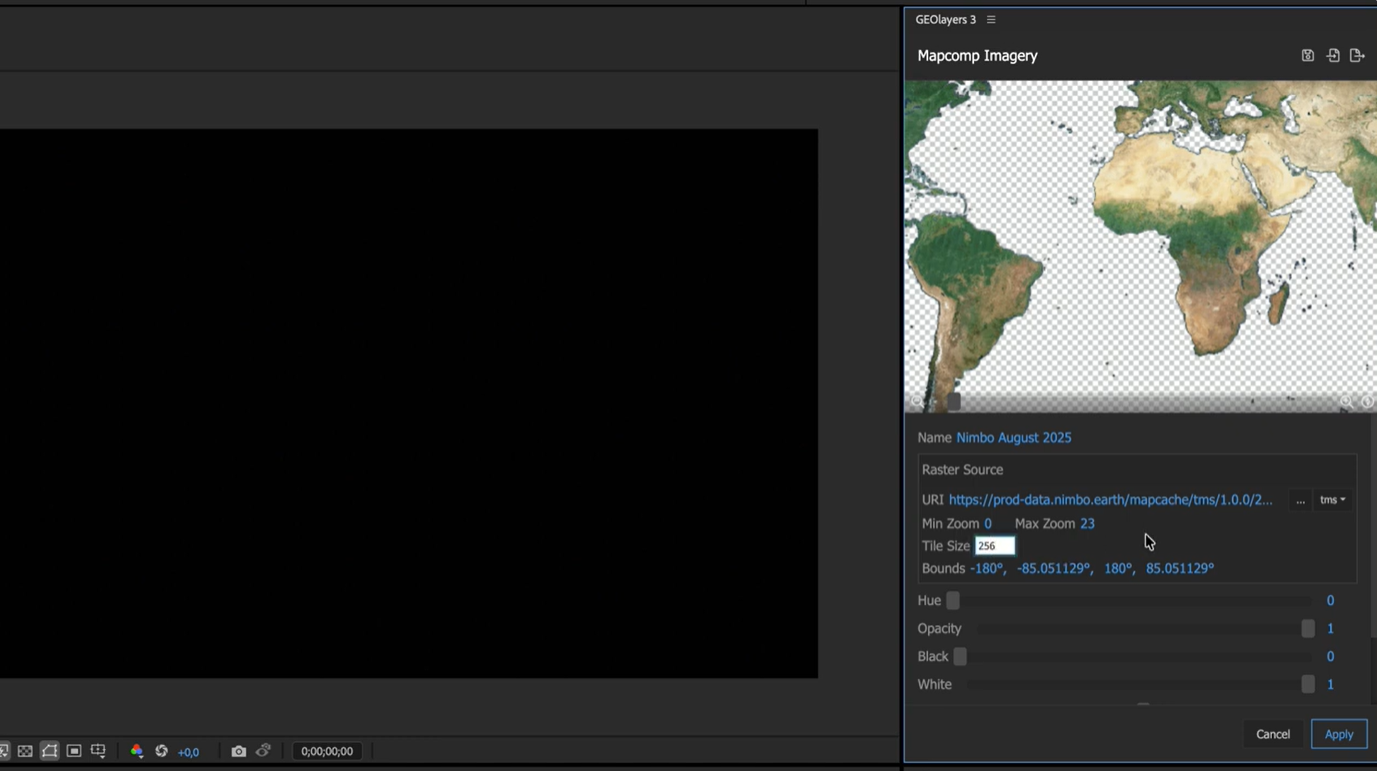
- Attribution: Enter “Nimbo” in the copyright field.
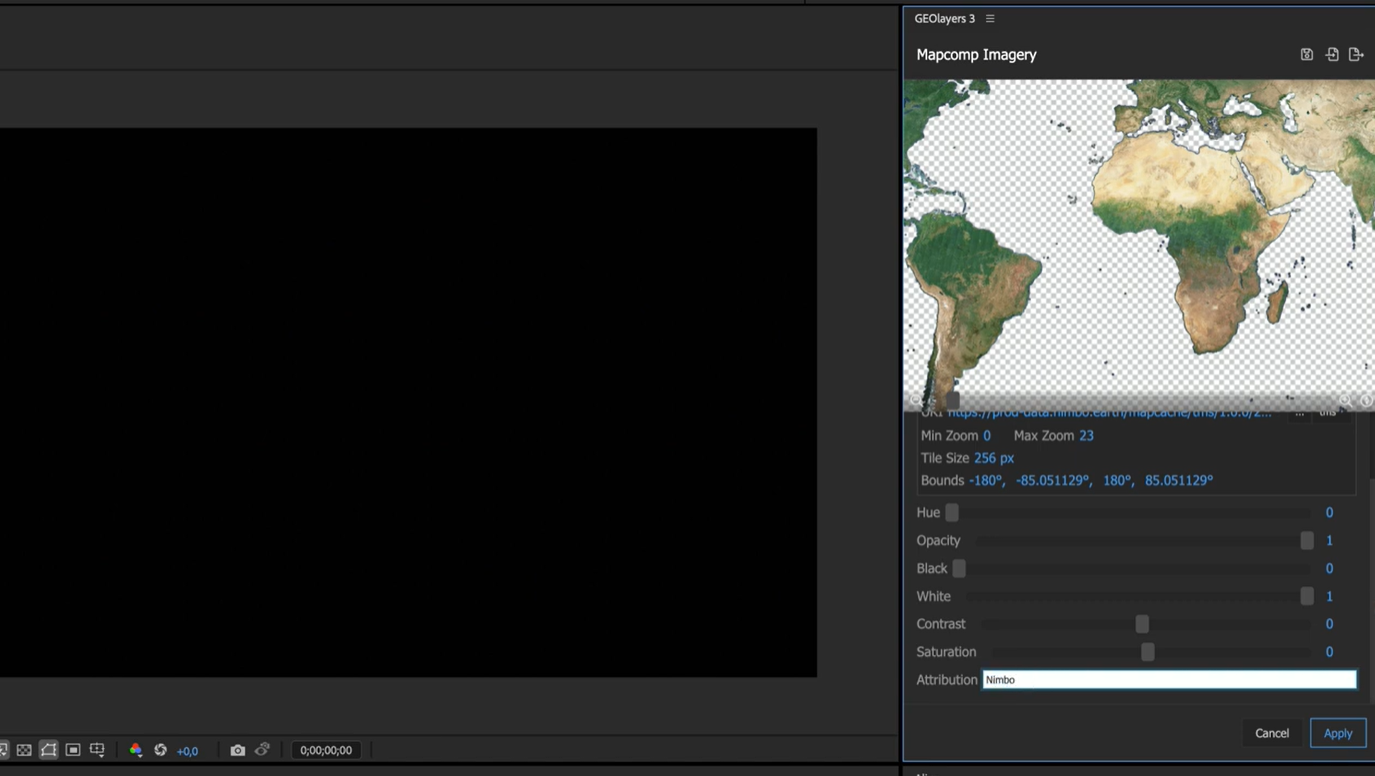
Click Apply and then click Apply again to validate the preferences.
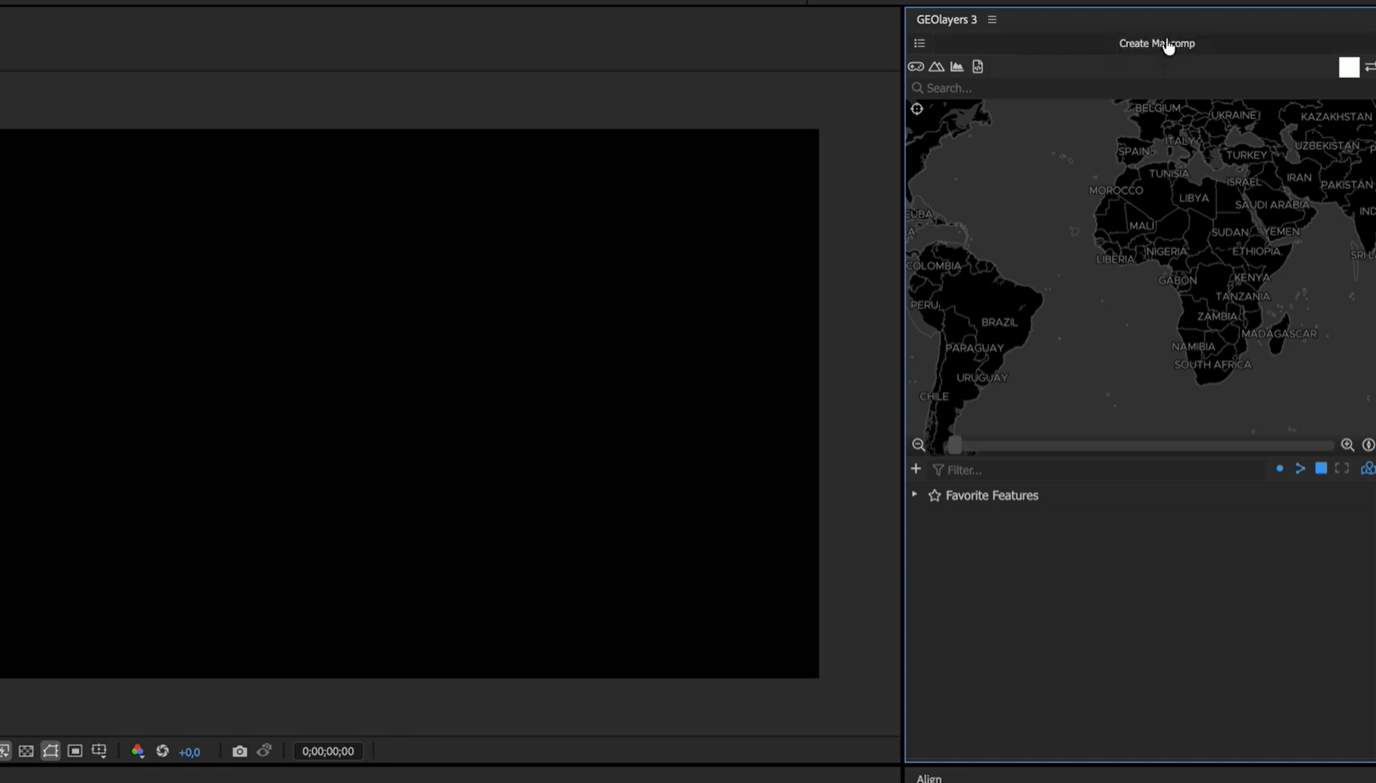
3. Creating the Map Composition
Section titled “3. Creating the Map Composition”Once registered, you can load your new base map into your project.
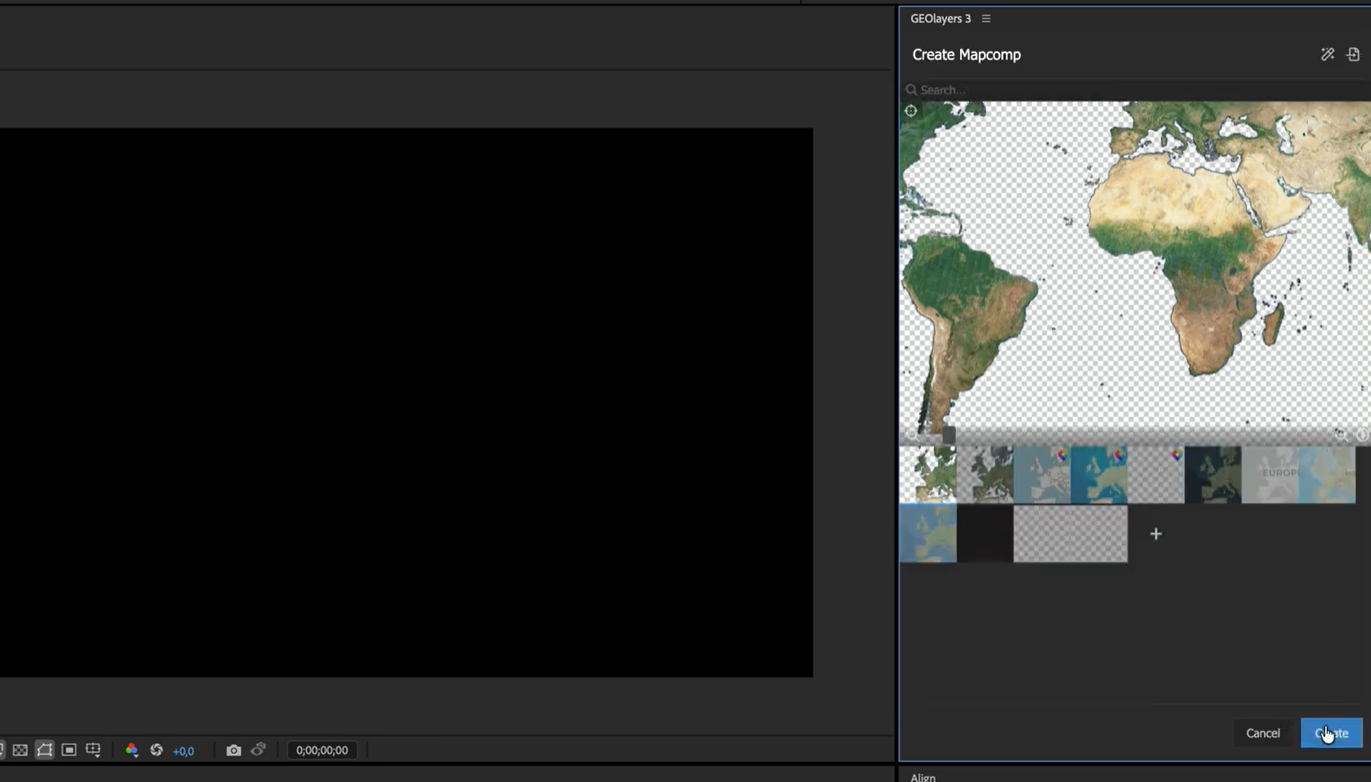
- Click Create Mapcomp at the top of the GeoLayers panel and click Next.
- Select your Nimbo base map from the top of the list, verify your settings, and click Create.
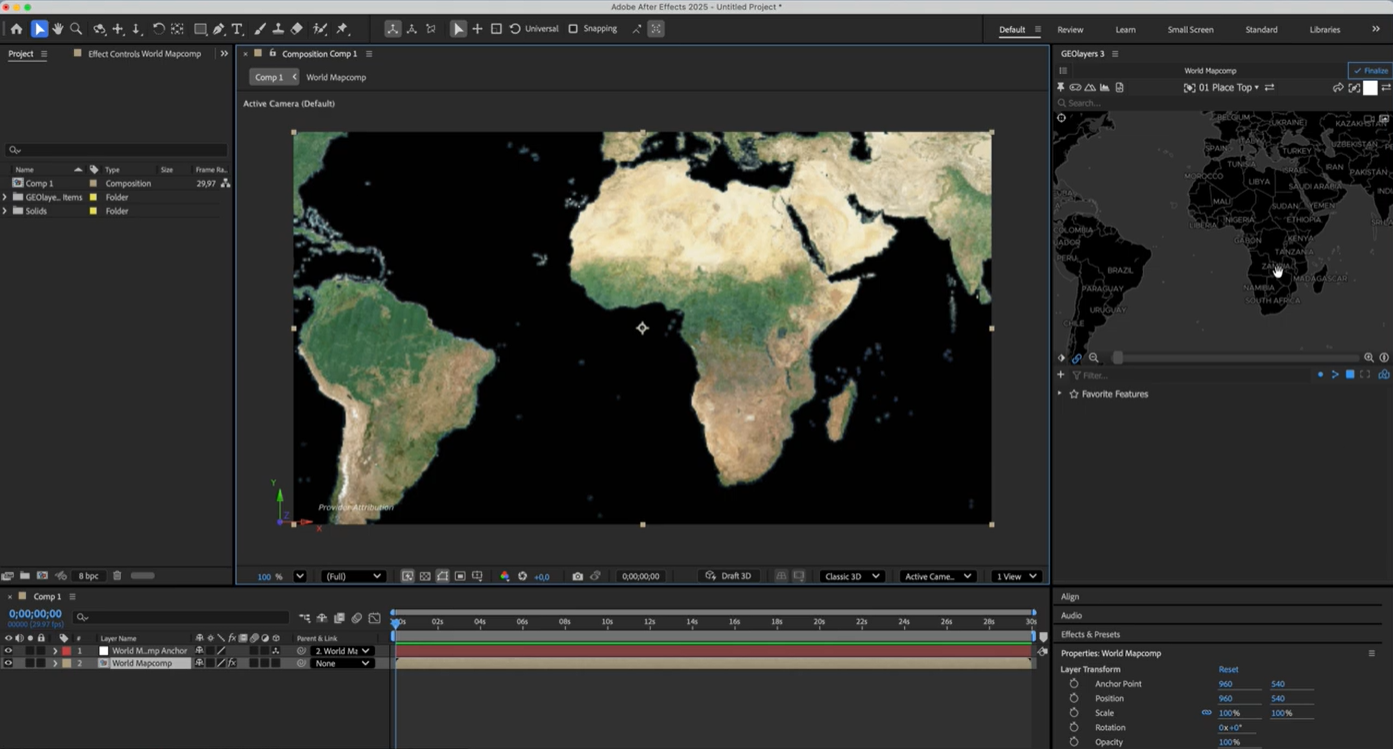
Final Result
Section titled “Final Result”The Nimbo data is now loaded into your composition and is fully editable for your broadcast animation.